David Donachie's Website

Skip Navigation
<<12345678>>

March 20th

This session Yael returned, so we had her help in the social scene with Krozier.

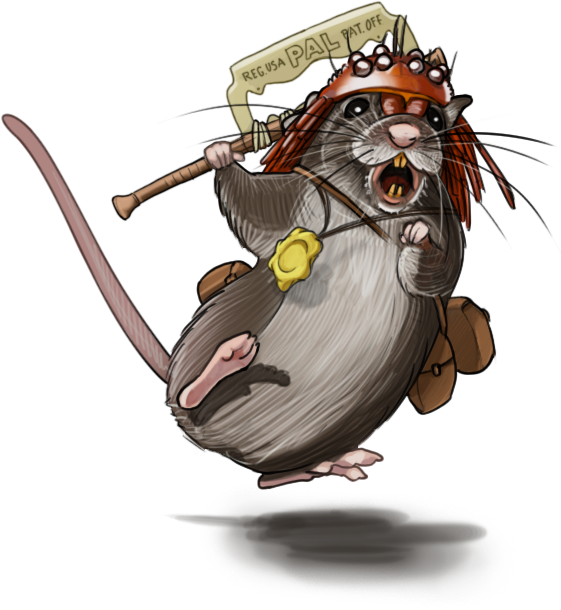
We return to the fight in the middle of the Bondmouse nest. Krozier leads the resistance against the talk of freedom. Meanwhile a sympathiser named Ketchup slips away to try and warn the rats, but Glenlivet spots him and gives chase. They dodge back and forth through the warren, and Ketchup nearly gives her the slip, but she catches him just in time and drags him back.

Meanwhile Behold and Merlot team up to argue with Krozier. They tell the Bondmice that if they don't seize this chance of freedom they may never get another. There is a doom coming, and the rats won't save them from it. Their argument is helped when Atrox arrives with Kameoleopardus, and Glenlivit drags Ketchup back. Krozier backs down and a wave of enthusiasm sweeps the slave Hylin — they might actually be able to escape!

Some of the other Bondmice still need persuading. Kindly, a wounded Fungus farmer, wants to help but isn't fit, and Kin, a young mother, had her pup stolen by Kree's mate. While Merlot tries to treat Kindly's injuries, Glenlivit swears she will get the pups back — and proves to be perfectly capable of doing so!

The party try to hatch a plan. They know that they need to spirit the Bondmice away while the rats are distracted; there is one obvious opportunity, Chardonnay will give Whiteclaw his fight. While the rats gather to watch, the others will escape through the spider tunnels, and then head for the vertical that leads to Black Dust. The others tell him that his plan is suicide, but he is adamant, and leaves to speak to Whiteclaw in front of the nest. He comes to the conclusion that Whiteclaw might let him live he he seems to be an honourable fighter.

Atrox proposes making a fake rat out of wood, fur, and rat scent, so that any sentry thinks that they are a work party. Marcus (recovered from his faint) paints Bond-marks on the players. Meanwhile the Bondmice prepare to move.

The fight and the flight are played simultaneously

The flight

The escaping hylins face a series of obstacles: tunnels full of spiders, guard rats, and then the long level until the safety of the vertical — they make all three look easy!

With the help of the Bondmice, and their own advance planning, they easily navigate the spider tunnels, then assemble their fake rat. It proves to be a good plan, since there a still a few sentries not at the fight. They see a number of marked hylins accompanied by what smells and looks like a rat (a rat stuffed with refugee hylins!) and let them pass. Then all that remains is a long dash through the level, coping with exhaustion, until they reach the vertical.

It would be the perfect escape — if only Chardonnay were with them — or so they think. They have just reached the top of the vertical when everything begins to shake ....

The fight

In front of the rat nest, battle is joined between rat and hylin — not an aged one like One-eye, but a rat Champion in his prime. It should be epic, a tale for the ages, but in truth Chardonnay is outmatched from the beginning. He manages to scratch Whiteclaw with Gilette, but the rat overbears him, clawing him badly and nearly ripping his throat out! Chardonnay dodges, trying to get behind the champion, but Whiteclaw is too quick! He bites Chardonnay again, putting him on the edge of death!

Chardonnay knows the fight is lost, but he refuses to go down easy! He rallies everything into one last attack (using the Determination rules) and slices Whiteclaw's ear from his head! Enraged, the rat raises his claws as Chardonnay collapses from the effort ....

At this point Chardonnay dies, having been reduced to 1 Life, he then takes 1 damage from the Determination. Since there is no one there to save him he's gone ... unless the other players agree to pay 3 Luck to save him. There are exactly 3 luck left in the game at this point, and the others agree, they will save Chardonnay! He still dies (as far as they know) but will somehow prove to be alive at a later date.

Whiteclaw rears for his attack ... and everything explodes! An incendiary bomb hits the house full on, and the Between collapses with a roar of dust and ash!

Will anyone survive?

Conclusions

  • Overall the session flowed very well. We tried new rules for spending Luck on facts, and for Determination (which allows you to ignore all wound penalties for an action, and then take 1 Exhausted) and both work well.
  • The fight with Chardonnay and Whiteclaw was tense, brutal, and totally fatal for the hylin. After weeks of discussion about whether any enemy could be hard enough for a specialised combat character, we saw that they most certainly could!
  • Using the 3 Luck to save Chardonnay was perfect! (That's a rule I took from my own game Sun Keld and it was a great idea)

March 13th

The party wakes in their "guest-quarters" after an uneasy night's rest. Atrox decides that he'd like to see what sort of tinkering the Bondmice do for the rats (and get his paws on a workshop). Finding that Kora is already standing by he asks to see the workshop, and she takes him there. He finds two Bondmice working on some sort of cutting tool, made with Hylin teeth ("where do you get the teeth from?" he asks — "You know, the bodies ...") and a burly looking Hylin called Krotek supervising.

Quickly working out that Krotek is no tinkerer he sends Kora back to get Chardonnay, who distracts Krotek with conversation about fighting. Kora, realising that no one us supervising the guests, rushes off, but not before Glenlivet sneaks away to look around the rat nest. She sees a lot of fat rats, some skinny Hylin, and entrances to the Empty. Eventually she finds a place where they have been nibbling something white and powdery off the wall — the source of the white marks on the Bondmice! She tries to eat a mouthful, but it gets all sticky. Before she can steal more, a rat turns up (the rat was a GM success from a failed scrounging test).

Glenlivet tries to fast talk the rat into thinking that she belongs there. Instead she convinces it that she is a Bondmouse out without its mark! The rat is not happy! It demands to know who her supervisor is, and she quickly claims that it is the workshop (where she knows Atrox and Chardonnay are). Grabbing her ungently in its jaws the rat drags her there!

Meanwhile, Marcus and Tabasco ask to be shown the view from the lead river again. Kora agrees, seeing it as another chance to persuade them to join the "alliance". It is day now, so the view is different, less fire, more smoke, but it is abundantly clear that nearby bits of the between have been demolished outright. Marcus tries to peer over the edge to get an idea of the lay of the land, but the sight is too terrifying for him

Meanwhile, in the workshop, Atrox manages to talk to one of the tinkerers, Kindling. Kindling reveals they are making a thing to cut up fungus — there is a huge mass of red-brown fungus nearby, Kindling's fur is stained with the dust from it. Atrox talks up the bounties of Cold Stone compared to the poor facilities in Eater-Kit, and Kindling — apparently a kindred spirit — says Atrox needs to go and speak to Kameoleopardus, in the Bondmice warren. Before he can say more, the rat arrives with the injured Glenlivet, and demands an explanation!

Krotek, his nose already put out of joint by Chardonnay, denies all knowledge of Glenlivet. The rat is about to punish her further, but Atrox and Chardonnay convince it that the Queen would be angry, and it eventually leaves — though not before scaring Glenlivet half to death!

Later ...

Everyone reconvenes, and goes for a walk, eventually managing to find a place where they think they can talk without being overheard. They agree that they don't want to end up like the Bondmice! They take a vote on what to do. Tabasco wants to flee, Glenlivet wants to rob the rats and then flee, Atrox wants to follow Kindling's advice. Both Marcus and Chardonnay agree that don't want to leave the Bondmice behind. If they can persuade them to rebel, maybe they can also persuade them to run away, although that may well mean abandoning Cold Stone. It's a sobering thought, but they all agree that disaster is coming anyway, and they can't leave the Bondmice behind. Chardonnay offers to challenge Whiteclaw to a duel, so that the rest can use the distraction to get away. It's almost certainly a suicide mission, but he is willing to try.

They still have to work out how to get to the warrens and persuade the Hylins, however.

Tabasco takes the holy liquid and has a vision. He realises that the rats generally sleep during the day. If they wait till noon, maybe they can get inside. Chardonnay suggests that he goes and distracts Whiteclaw, while Marcus decides to steal more white stuff. The rest wait, and then try to sneak into the warrens.

Divide and Conquer

Marcus' expedition goes moderately well. He finds the white-stuff without incident, and sets about chewing off a pouch-full. Sadly the work is too exhausting for him, and he has to take a nap, which makes him sit out the next scene. Chardonnay, meanwhile, encounters Whiteclaw, and forms the opinion that he is honourable — for a rat. As long as Chardonnay doesn't cheat, Whiteclaw would probably accept his surrender.

The others try the tunnel to the warrens. As the vision suggested, the two rat guards are asleep, and they manage to sneak past them. They find themselves in the warrens, which are close, mildew covered, and boiling with tension. Nervous Bondmice — obviously in far worse condition than the few show-slaves they have been shown — watch the strangers fearfully. The whole place feels like a powder-keg.

They try asking for directions to find Kameoleopardus, instead they end up being confronted by Krozier, a one-eyed Hylin who tells them they cannot fight their doom! Rot will claim them all! Krozier seems demented, but attracts an audience, so Tobasco tries facing up to him. Their duel of words quickly turns nasty, it might boil over into violence at any moment. Tobasco does learn that it was Kora who took Krozier's eye, and his powers as a seer.

Glenlivet spots one mouse sneaking for the exit, no doubt going to warn the rats, and gives chase! Atrox decides he needs to find Kameoleopardus instead, and goes looking for him. Luckily the old Hylin — the last surviving who remembers freedom — is easy to find, and when Atrox introduces himself as Katrox, the elder is convinced that there is a lost colony of High Wood out there, one still following the old ways (i.e. names starting with a K). Kameoleopardus is instantly sympathetic to Katrox's plea to rebel (Atrox's player won the roll with a handy 5 successes!) and they hurry to try and save Tabasco before chaos breaks out!

Conclusions

  • Before the session Marcus' player raised the concern that the mechanics were not deadly enough, leading to players not feeling challenged. We discussed a number of rules tweaks that might resolve this. We didn't use any of them this session. Despite this Glenlivet was nearly taken out, Marcus was taken out, and Tabasco was reduced to 1 Life with all his Luck spent! Rolls failed all over the place, and Trouble nearly got out of hand. Conclusion: watch the danger issue, but don't change anything yet.
  • Rendering Marcus unconscious from mining was a bad call. I did 2 Exhausted Damage, not realising how close to zero he was. Mostly it was to avoid a repeat of the "rat turns up and is angry" scene, but I should have thought of something more dramatic to do with my successes.
  • The new social defensive edge (Cringing) was used for the first time. The 1 Armour it provides Kept Tabasco in the fight, but he needs rescuing!
  • Again, this session showed the weaknesses of the hyper-specialised characters when they tried to do things other than their area of expertise. That's probably a good thing.
  • I gave each Bondmouse a personality trait that would give the players a bonus dice if they worked it out. e.g. Kameoleopardus gave a bonus dice if his nostalgia was appealed too, while Krozier wants revenge.
  • I represented the "Bondmices' Fear" as an Obstacle that needs damage to overcome. Each Bondmouse persaded to the cause does one Damage, as do other relevant actions. So far Atrox has inflicted 2 Damage on it — one for his workshop propaganda, one for persuading Kameoleopardus.

March 6th

The previous session ended on high drama: Marcus beat Chardonnay in a fight and took his Champion's badge, and an ominous incident with a rat scared Cinzano.

A couple of weeks have passed since the funeral, and Rain has bled over into Spring. The Tribe has 1 Afraid (from Absinthe's prophecy) and 1 Hurt (from the fight between Chardonnay and Marcus). The Eater idol, in all its glory, sits outside Behold's burrow, quieter now that his daughter has headed out into the Between.It is time for an adventure called Queen of all she surveys.

Back in the nest the debate about the Champion still rages. Marcus is trying to argue that the Champion isn't needed — there should be a chief warrior, but someone more level headed should be in charge. Tonic, ever the traditionalist, says that chief warrior is the same thing as Champion! We start the session playing this argument out in character, with the other characters siding with Tonic. Eventually Tonic agrees that perhaps a negotiator of some sort is needed — everyone has heard about the rat's message — but that doesn't mean they shouldn't have a Champion, they just need someone else as well, a mastermind, a leader. Tonic remembers a picture she saw on a bottle once of an Eater who seems to fit the part, and proposes that the new role be called The Napoleon. Marcus has no choice but to agree.

The players quickly decide that an election is the right way to choose a Napoleon. Marcus demurs, so Junizu puts herself forward. So does Vimto. As soon as Vimto does, Merlot does, and Behold decides to throw his paw in the ring as well. The election is fought dirtily, but in the end Jinzu wins. We come up with a new power for the Napoleon title — once per adventure, she can remove a point of Hurt from the Tribe, and she quickly heals the 1 Damage from last session.

Apparently just in time. No sooner has Jinzu accept the offer than Bailey arrives at the nest with an urgent message. Three strange Hylin are approaching, and they smell of rat!

A Delegation

Soon the strange Hylin arrive. They are dark grey, but on each one's back a rat's paw-print in white can be seen. The scouts think there may be rats close by, but they appear to be trying not to show themselves. The strangers introduce themselves as Kree, Killi, and Kora — Bondmice of the Queen of the Eater Kit Pack, also called "Queen of the Upper Places", leader of the rat pack. The Bondmice are a Hylin tribe that have sworn some sort of allegiance to the rats. Kree calls it "a partnership" but the Cold Stone mice aren't sure.

The new Napoleon Jinzu, and the Champion Chardonnay, greet the strangers constantly. They ask for shelter, they've been in the Between for days, and Merlot cunningly presses the former quarantine camp of the Black Dust Tribe into use. Kora hangs a banner on the front.

The next day the Bondmice present an offer from the Queen. She invites the Cold Stone Tribe to send representatives up to her nest, with a view to joining her alliance. Kree, earnest, assures the players that they must do so, they have no choice. A terrible doom is coming, and the rats are the only hope they have for survival! Killi seems less fervent, but doesn't speak up, and no one gets the chance to speak to him alone. When they don't believe him he tells them that there is absolute proof at the rat's nest. If they come, he can show them. Reluctantly the Cold Stone Tribe agrees to send a delegation.

Meanwhile Jinzu and Behold try to work out who these Bondmice are. Not Cold Stone, not Black Dust. The only other Tribe they have ever heard of was called "High Wood" but they know nothing about them.

The delegation sets out a few days later. It consists of Merlot, Marcus, Jinzu, Chardonnay (still due to have a duel with the Queen's champion), Atrox (who prepares by making poison with Chardonnay), and Glenlivet. Behold does not wish to go, so his player quickly generates a character sheet for Tabasco, who goes as a proxy for Vimto.

On the road

It is a two day trip up through the verticals and levels to the rat's nest. The party sees no rats, but is sure they are close by. On the way Marcus tries his best to befriend Killi, but the youngster is nervous, and reticent. Even with the other distracting Kora and Kree he won't open up entirely, but promises to show Marcus something when they get to the nest.

The Rat's Nest

The rat's nest is a huge heap of torn cloth and stolen clothing pressed up against a vertical high up in the Between. One of the Eater Kits' idols, its head chewed off, stands at an angle at the front. Bondmice scurry about, while huge rats swagger. It is terrifying, but Chardonnay uses the Champion's ability to make everyone avoid the Afraid Damage. No sooner have the party arrived than a massive rat with one white paw appears — Whiteclaw. Whiteclaw would happily fight Chardonnay on the spot, but the Queen wants to see them.

The visitors are led to the Queen's chamber, a big open space with a lead river running along the back, and many rat hangers on, heaped up in a pile with the Queen on top. Kree seems to be a favoured councillor.

The Queen offers much the same as Kree has outlined. An alliance, although one where the rats are clearly on top. She presents it as both the sensible option, and an inevitable one. She doesn't go as far as actually threatening them, but close to it. (Some players are of the opinion that this sweet approach is Kree's plan, rather than the Queen's.) The characters try arguing, but without conviction, and she cuts them short by ordering Kree to give them a tour of the nest, so that they can see how nice it is, and then be given a chance to rests and discuss. It's clear they won't be allowed to leave.

Kree takes the characters on a guided tour, where they see happy and well-fed Bondmice working with the rats and living in spacious burrows. He makes it sound like a rat-led utopia. Marcus, meanwhile, is desperately looking for an opportunity to slip away with Killi and find what he wanted to show them. Tabasco enters a trance state where he sees the patterns and movements of the rats, picking out the perfect moment where Marcus can slip away.

Killi takes Marcus into a side-passage and explains that the mice they have just seen are "trusties" working with the Queen. Most of the Bondmice are ill-fed and ill-treated, kept trapped in their own warren. He tells Marcus that they used to be the High Wood Tribe once, but the rats conquered them. Their own Champion fought a rat and almost won, but the rats killed him anyway and seized the tribe. Now they are prisoners. Marcus tries to persuade Killi to rebel, but the youngster is too afraid; Marcus will need to talk to the other mice directly.

Killi tries to take Marcus to the Bondmouse warren, but they find the way guarded by two rats. Marcus tries to bribe them with food, but they take the food and smack him, and he has to run away. Killi tells him that the only other way into the warren is a back tunnel full of spiders, but Marcus doesn't fancy that alone.

Meanwhile, back in the main nest, Jinzu and Merlot ask Kree to show them the 'evidence' he mentioned back at Cold Stone. He agrees, and leads Jinzu, Merlot, and Atrox to the lead river. A hole has been gnawed in the side, and they see that it is hollow. Following it for some way they find themselves looking out over the Great Empty! It is full of fire! Pillars of light cross the open space; things burn and collapse; huge roars shake the night! The sight inflicts 1 Afraid on each of them. Kree tells them that the Eaters have turned on them, they are destroying the Between, and it is growing worse, day by day. Soon their part of the Between will be destroyed too, and only the rats can save them.

The chastened and afraid Hylins accept the offer of a place to rest and eat, and meet up with Marcus. Fearing that they might be overheard through the thin walls, they scribble notes on scraps of cloth and then eat them. They need a plan, but they haven't got one, other than a fight to the death with Whiteclaw. "If I win, they might let us go, or respect us," says Chardonnay, then Marcus tells him about the fate of High Wood's champion. Atrox considers poisoning the whole nest, but he doesn't have enough poison, but maybe he can make whiteclaw sick? Marcus wants a rebellion, but is no closer to having it.

The session ends with no plan yet winning, but this adventure will be three sessions long, so they have time.

Conclusions

  • There was a lot of RP this week, which is no bad thing, although it doesn't test a lot of mechanics.
  • Marcus failed a roll for the first time! Rats are more serious Trouble than mice or woodlice!

February 27th

This was a short adventure, lasting one evening, to suit the time constraints of the 10-session block I have to work with. I decide to start with a vingette for each player. As it happens only a few players can make this session, so some vignettes go unused.

The adventure is called Figurines in Passing.

Merlot

Winter is shading into Rain (the first season of the new year), and Clorox — now Merlot's mentor — has fallen ill. He calls Merlot to him, and tells he he won't last long, and he wants her to have the source of his power, a fragment of a label taken from a sacred bottle (the rest was stolen from him by Glenlivet in her backstory). If she agrees she will become a seer proper, and a rival to Vimto. She tells him she is sure he will get better, but accepts the label anyway (it grants +1 Dice in Visions).

A week later Clorox is dead.

Marcus

Marcus is visited by Brasso, the former Champion. Though Brasso swore to serve Chardonnay, he feels that he has no real place in the Tribe now — Chardonnay doens't need him. He comes to Marcus to ask if he should leave the Tribe and become a Waykeeper.

Marcus doesn't want him to leave. He tells him that Brasso is brave, and the Tribe needs that bravery. If Chardonnay falls, Brasso will fight, no matter what it costs him. Brasso decides to remain after all.

Behold

Behold's daughter — who is also called Chardonnay — has been sharing a burrow with Jinzu's son Bailey. Now she has some newborn pups to show her Dad; they don't have names yet. While Behold gives the pups a groom, Chardonnay tells him that she and Bailey are worried that Absinthe's doom is getting closer, and that their children might be in danger. Since both Chardonnay and Bailey were born outside the nest (Behold and Jinzu were both Waykeepers) they are thinking of leaving to be Waykeepers themselves, because it might be safer.

Behold agrees! He shares his wisdom with his daughter.

Atrox

Atrox is approached by the Hunter Cinzano, who wants to hunt a centipede with the Netinator. He agrees and the two head off into the Dripping Level.

As a result of these scenes of bonding, the Tribe heals the 1 Exhausted it had from the arrival of the Black Dust Tribe last session.

After the vignettes are over, Merlot organises a funeral for Clorox in the Sacred Bottle Place, to which she insists that all the available mice she can find (Behold and Marcus) come. To her annoyance Vimto insists on coming, along with a contingent of her Cult of the Dead Eater followers, one of which is Iro, who has renamed himself Tabasco. Tabasco's membership of the cult upsets Merlot further, and she does her best to try and persuade him to leave.

Meanwhile Glenlivet, always the loner, is off by herself behind the skirting boards of the Sacred Bottle Place. She hears a noise, and sticks her nose through a gap to see the two Eater Kits, come down into the cellar. One — the larger — has something on his head, and cloth that covers the top of his legs, the other wears some sort of all-over cloth. The two sit on the floor and start to do something with what Glenlivet identifies as small effigies of Eaters (the two children are playing with makeshift dolls made from clothespegs).

Immediately she wants one! And she pushes herself through the gap to go after them!

At around this point the funeral procession (which is behind the bottles on the shelf) becomes aware of the Eaters. The cultists and Vimto take this as a religious message, and some of the cultists start to gather at the edge of the shelf, ready to run to the Eaters. Merlot takes exception! Vimto and she have a 'vision off' to try and control the situation, but it goes badly for Merlot. Only Tobasco seems to be listening. He is still carrying his Eater mask, but he's taken it off.

Behold decides that reinforcements are needed, and he runs off back to the nest, finding Bailey, Jinzu, Brasso and Chardonnay (the PC) willing to come with him.

Before the situtation can be resolved the big Eater appears, and calls two the other two, who abbandon their play and run from the cellar — but not before leaving one of their idols behind! Naturally everyone decides they must have it! Vimto wants to worship it, Merlot wants to keep it from Vimto, and Behold just wants to remove it. Of course Glenlivet, who somehow avoided the Eater's giant feet, is there first, and sets about trying to steal it. The only problem is that it is about four times her size!

While Merlot tries to block the cultists, and Behold leads his posse off behind the skirting, Marcus jumps down and runs to the idol. Here he scraps with Glenlivet, browbeating her into giving up the idol to him. However, no sooner has he done so, than the cultist mob turns up and tramples him, taking it for themselves. Moments later Behold also arrives!

At this point Chardonnay's player arrives.

Chardonnay, seeing violent Hylin attacking each other, rushes in to try and stop them, pushing some back, but getting bitten and scratched in the process. In the confusion Marcus blames Chardonnay for the violence, and the two face off in some unexpected PVP. While Behold succeeds in getting the idol, Marcus and Chardonnay beat each other up, before Marcus steals Chardonnay's Champion badge — calling him unfit — and storms off. A rift has appeared in the Tribe and it might be fatal!

The session ends on this uneasy note, and the Tribe takes 1 Hurt from the PvP.

Coda

Out in the Between on his own, Cinzano is packing centipede bits, when he feels a giant hand settle on his neck. "You Cold Stone?" says the rat? In response to his terrified nodding the rat says: "Champion Whiteclaw heard about your mouse who beat a rat, and he wants a go. Tell this Chardonnay to come and face him, or else!"

Conclusions

  • Everything went very smoothly up to the PvP, which I was not prepared for. It was late, players were tired, and passions got raised, and I could have handled it better.
  • The game is not set up for PvP. There were immediate questions about who (if anyone) got to spend Tribe Dice. Afterwards I add some PvP rules, which sum up to:
    • Don't
    • If you must, neither side can use Tribe Dice
    • If one player Takes Out another, the Tribe takes 1 Hurt damage
  • I really like the vignettes as a change of pace from the adventures so far.
<<12345678>>