David Donachie's Website

Skip Navigation

The Cold Stone Campaign

The Cold Stone Campaign was a playtest campaign of InBetween running from January to April 2019.


Merlot

Playtests Spring 2019

After the Christmas break I ended up with a completely new group of players (though with two other players intending to return): Robert, Sakura, Yael, Craig, and Liam. Our first session was 100% Tribe and character creation.

The Tribe

Cold Stone Tribe is situated in a place of deep dark stone where the Eaters seldom come. Located above it is the Glass Bottle Place, where the Eaters store mysterious liquids in enormous glass towers. Sometimes these liquids drip or spill, seeping into the Between. As a rite of passage, Yearlings of the Tribe must try one of these spills. Sometimes the liquid is deadly, sometimes it brings visions. Indeed, many of the tribe profess to be seers of some sort or other; true seers have been driven blind by the liquids.

The Characters

  • Behold — a Waykeeper who returned to the nest to have pups
  • Jinzu — another Waykeeper, who also returned to have pups ... but not the same pups
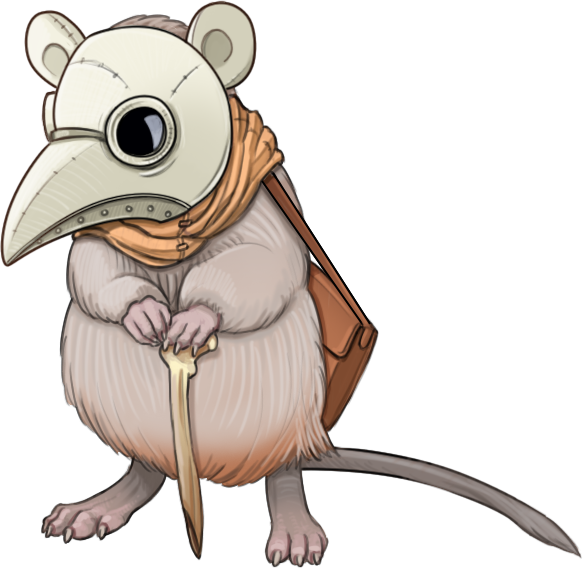
  • Merlot — a sickly individual in a plague mask who cares for the Yearlings
  • Atrox — a tinkerer alchemist with an unadvisable love of fire
  • Marcus — an old former Champion with a desire to resolve everything peacefully

Conclusions

  • Tribe design was a blast, as it always is. I've added a section to the GM rules with tips on running it
  • Character design took a long time, partly due to a shortage of Activity sheets. I need a "Quick Reference" document for them

January 30th

The number of characters goes up to six, as Ben rejoins the game with his Guardian Chardonnay.

The new game begins with a re-visit of the scenario Knight of Sorrows used in the previous term — the Hylin of Cold Stone nest are awoken on the edge of dawn by strange and terrifying noises. A rattling series of bangs, then a crash so loud that it shakes the world, followed by an unsettling wail from from somewhere in the Empty that starts but does not stop. The Tribe is scared and frantic.

Two warring Seers, Clorox and Vimto, have different explanations for the noise, and what they should do about it. Clorox thinks it the sound of Fate — coming for the tribe because their Luck has run out — and that they need to go out and prove that they are still lucky any way they can. Vimto thinks that it is the howl of an Eater Beast, and they need to stay in the nest and avoid it at all costs. The characters get involved in this argument, which rapidly comes to bites and scratches, before Marcus (the peacemaker) intervenes. The players suggest that the two Seers submit to some higher authority — the only one they will agree on is Absinthe, the venerable seer who lives in the Sacred Bottle Place.

The group decide to go and see Absinthe (very reluctantly on Merlot's part). This involves a trip through the Between. On the way they run into Iro a Yearling from the Black Dust Tribe, who is fleeing from spiders! He begs the Cold Stoner's to help find his brother Parro, and their friend and guardian Kirra, who stayed behind to fight the spiders. The group ends up split in two. Chardonnay finds Parro, and kills some spiders, while Atrox finds Kirra and gets eaten by spiders! (well just about). Luckily Chardonnay comes to help before he can be killed. The three Black Dust mice have also come to investigate the noise, and tell a tale of sickness in their own nest.

The party moves to the Sacred Bottle Place, emerging halfway up the "Ladder of Heaven" where the bottles are stored. Leaving Kirri, Parro, and Iro to rest, they rig a climbing device attached to Behold's snail and scale the heights, till they find Absinthe, who is bright green! The old blind seer seems to have no trouble knowing who they are. He has been expecting them. He tells them he has had a vision of sickness, famine, fire, flood, and earthquake (in that order), and that only finding the answer to the noise may help. He believes the answer lies in the Empty, and gives them a map — scratched onto a beetle shell — showing the way.

He also offers the chance to try the "sacred green liquid" to see if the party can have visions of their own. They all leap to accept (except Chardonnay). As a result each gets a vision scene, along with a Legend along the lines of "Haunted by the Green Fairy" or "Enlightened by the Green Fairy". Only Merlot and Behold see useful things, the rest see only their own pasts. Behold sees a strange wheeled device that he believes might help them in the Empty. Merlot sees a terrible Eater Beast descending on them all ... only for them to be saved by an Eater before it can happen (giant hands descend from the sky and take it away). This convinces her that she must go with the others.

Conclusions

  • I used "Damage and Move on" more frequently in this session, and achieved good results (e.g. 1 Afraid for hearing the prophecy).
  • The vision-granting scene was incredible fun. Thinking up the various "Green Fairy" Legends was also fun.

February 6th

The number of characters goes up to seven, as Robyn rejoins the game with her Thief Glenlivet.

The group has agreed to follow Absinthe's map and find their way to the source of the strange noises. They take a Rest to heal some of their Afraid damage, and then descend the Ladder of Heaven, picking up the three Black Dust mice on the way. A little further down Chardonnay (the Hylin with the highest sensing) spots a recent trail of crumbs, and they discover Glenlivet, a mouse exciled from Cold Stone for stealing a sacred Thing (a scrap of a bottle label) from Clorox. Glenlivet claims to know the Empty well, so they agree to let her guide them, in return for entreating Absinthe to allow her back into the Tribe.

Soon they reach the bottom of the chamber, and must cross the pitch-black expanse of teracotta tiles. They hurry to a wall, and soon reach the far side where (as Absinthe told them) a series of cliffs and flats leads up to a huge wooden wall (a door). They climb these steps without too much trouble, but at the top they see that the gap under the door is choked with webbing and balls of un-hatched spider eggs!

There is an argument about what to do. Atrox and Chardonnay want to destroy the eggs, and set about making an incendiary (using the Tribe's "Bountiful: Spices" trait to produce materials). The others just want to sneak past, and try a series of Helping Tests to set it up. Sadly they fail, and one of the egg sacs bursts open, unleashing a tide of tiny spiderlings! Chardonnay winds up to throw the incendiary while the others scarper through the gap into whatever blinding light is beyond. Amazingly he gets 6 successes on his check, destroying the spiderlings (a 6 Dice Monster) in one go!

On the other side, the Hylin find themselves in the Empty for the first time! It is enormous and blindingly bright. Squares of coloured light are everywhere, illuminating an enormous orange furry thing that seems to be sleeping in the middle distance. Everyone makes a Daring 3 test to avoid an Afraid Damage (and mostly fail).

The group can see where they want to go, but it is beyond the orange thing. Luckily the strange wheeled structure that Behold saw in his vision is nearby, and they all hide underneath it. A few moments later a young Eater enters the Empty! — But then leaves again. Quickly some of the mice investigate the structure, there are nests of white china, and bright shiny metal things they can sit on, but not much cover. They decide to push the structure to where they need to go, but it only gets halfway, and that seems to wake the creature up. They run for the next area with the creature in pursuit, but just as Merlot saw in her vision it is snatched into the sky by an Eater before it can catch her. She hides with the others in the thick forest of cloth tufts that covers the next chamber. (Somewhere behind them the door is smouldering).

Now they can see the source of the noise — it is an Eater crying. Jinzu figures the Eater has lost something and goes to look for it. Merlot decides a vision is required, and falls over foaming at the mouth! All this (and the group of nice Hylin) attracts the attention of the Eater Beast being held by the young Eater! Merlot's vision shows two Eaters struggling, a brown and a blue. The blue one doesn't want the brown one to go because it will be killed, but it goes anyway, heading into the unbearable light, and shutting something behind it that makes the whole world shake. The group conclude that the other Eater is dead, and the blue Eater is crying because of it. They aren't sure how this helps them, but at this point the Beast breaks free of its captor and they flee.

Cue a quick chase back down the passage. Chardonnay is sure he could fight the beast, but no one is listening, instead they run back under the wheeled Thing, which the Beast promptly crashes into, sending it flying. The Eater comes running, but sees the smoke from the fire instead of the Hylins, and they get away into the dark while it stamps on the fire.

In closing, they return to the Tribe (with the Black Dusters going back to theirs) along with Glenlivet, who Absinthe vouches for. They spread the news of what they have seen. Glenlivet avoids Clorox, but Merlot agrees to study being a Seer with him. After this we award Legends.

Conclusions

  • A group of six players can get a lot of Dice. Would this let them fight an Eater Beast? It shouldn't.
  • The Quick Helping Optional Rule is too good with this many characters, it is basically +6 Dice. We agree to change the rule so that the Helper must have a score of at least 2 in whatever the helpee is rolling, otherwise they have to roll to Help.
  • Having the Beast as a Turn by Turn Hazard worked okay, but not perfectly. While it was clear that the players could roll against the Obstacle 8 the Beast presented to avoid 1 Hurt a turn, it wasn't clear what they would be rolling the rest of the time. i.e. there still needs to be a pool to roll against if you want to overcome/escape the Beast.
  • I decided to drop the cap on Stats from 5 to 4. Getting a 5 in a Stat is easier than I originally anticipated, and the system seems to work better when Luck Dice are a limiting factor. Right now high Stats are too good.

February 13th

A season and more passes for Cold Stone, with no sign of Absinthe's Disasters, but slowly it becomes clear that food is less easy to find. The Eaters no longer drop gifts in the Food Gift Place, there are fewer beetles and plants. By winter, the Tribe is on the edge of famine. Some mice, convinced that this is related to the death of the Eater reported in summer, take to wearing pictures of Eater faces — torn from a strange heap of paper they found — over their own, calling themselves the "Cult of the Dead Eater", and hoping that in this way fate will feed them.

For this adventure I add both a time-limit (9 Rests), and a one-off mechanic. To secure the Tribe from hunger the party must secure 20 points of Food Source (Individual food items are 1/5th of an FS) by discovering new food sources in the Between. If they don't do so before the 9 Rests are over then the Tribe will take 1 Hungry damage.

Atrox and Chardonnay decide that they must hunt bigger prey. There are centipedes in the Dripping Level sometimes, they just need a weapon to hunt them. They decide to construct a sticky web throwing catapult The Netinator and devote a Rest to it ... then another Rest ... then another Rest. By the time they have done, a whole third of the time limit is past!

In the meantime, while Jinzu is hiding food in the Between to prepare for an exodus, Behold, the other former Waykeeper, decides to go and recover one of his own caches from a previous year and bring it back to help the Tribe. Unluckily it turns out that a pack of rats has moved into the area where the cache is hidden! He tries to sneak past them, but is caught by a rat scout. In the desperate battle that follows he is helped by Glenlivit who sneakily followed him (after going through his stuff — ever the thief). Both are badly mauled by the rat, but Behold pretends to be dead, giving Glenlivit the chance to flee!

Reaching the Nest, Glenlivit tells the others about the Rats. Chardonnay and Atrox are all for fighting the rats right now, but most of the rest, including the Champion Brasso, think it maddness. If they hide down here the rats will probably move on. Chardonnay disagrees, and to get his way, challenges Brasso for the title of Champion! The ensuing fight is short and one-sided, Chardonnay is a far more vicious warrior than the inexperienced Brasso.

Armed with his trusty weapon Gilette and the Champion's token, Chardonnay (with the others as reluctant retinue) goes to confront the rats, who turn out to be a gang of young batchelors and infirm old males who have been kicked out of their pack (The Eater Kid Pack) because food is scarce. Chardonnay masters his fear of the rats, and demands a one on one fight with their Champion. The rats argue, each competing for the right to be champion by promising the worst death they can think of for the little mouse. In the end an old rat with one-eye wins.

What follows is almost as one-sided as the fight with Brasso! Using the combination of a lucky roll, the poison he got from Absinthe in the summer, and the Champion ability (+1 Hurt Damage), Chardonnay seriously wounds the rat on the first roll, and it is easy sailing from there on. In the end he spares one-eye's life in return for a promise that the rats will leave the area. (Behold's food cache is recovered, and provides 3FS)

Only afterwards, realising that days have been wasted on things that have produced little to no food, does the party have a serious talk about what to do next. Glenlivit mentions that when she was an exile there was a family of mice one level up who she traded with for food. There is a big, mostly deserted, level up there, which she calls the Quiet Level. In the middle, is an enormous black monolith of metal hidden in the level itself. With no better plan, everyone agrees to prepare an expedition to the monolith.

Before they can set out, a ragged procession arrives at the Nest — the survivors of the Black Dust Tribe, led by Kiri, Iro and Parro. Kiri explains that the famine hit their tribe as well, but the many sick Hylin were too weak to survive it. Many perished, and the survivors decided to abandon their home and seek shelter with Cold Stone. Kiri led them on a great trek and the ten outside the nest are all that survive.

There is instant argument: What to do about the survivors. Some are for turning them away; Chardonnay suggests eating them; Merlot insists that they are quarantined. In the end they are allowed to stay — outside the main nest. The Tribe takes 1 Exhausted Damage.

Conclusions

  • Chardonnay should not have won the fight with the rat so easily. It is a fight that can be won, but it was almost casual. There were a number of reasons: I forgot my own solo advice and didn't give the rat armour; I shouldn't allow abilities that stack bonus damage — so I changed the champion ability to inspiration instead; I ignored Size; there is no penalty for having a low initiative in a solo battle — Chardonnay went second, but it didn't matter. I've added a tentative First Strike rule to address this, but I am not 100% convinced I have the right answer yet.
  • Chardonnay had too many dice. Players suggested a slightly more punative ageing curve to reduce the dice assigned to older mice.
  • There was no advantage to defending with Dodging instead of Fighting, I gave Dodging a bonus armour, and added Cringing as a social equivalent.
  • The use of Rests as a timing mechanism went great! Once the players realised they were properly on a clock they were driven to action. That's the sort of tension I want.
  • The improvisational nature of spending successes went really well in Behold's encounter. The rats, the food cache, and the place he hid, were all from player and GM narrated successes.

February 20th

After some lengthy preparation (each Hylin gets 1d3 scraps — Atrox takes string) the group set out for the distant monolith, after an inspirational speech from old Tonic. Merlot, who has been amongst the Black Dusters with her plague mask, declares that they are safe (a week has passed and no one is sick), but the party decide not to take them on their trip.

Their route takes them all the way up the Brick Vertical (scene of the encounters with the Black Dust Tribe and the Rats), to the level above, where there is wood above, and wood below, and the space Between is filled with a layer of ash, and then great clumps of some sort of fur (Eater hair?). The trip is long (takes 1 Rest) and tireing — everyone takes 1 Exhausted Damage, and must each 1 Food or take 1 Hungry as well. Some of the characters, notably Behold and Chardonnay, are in a bad way.

The mice find a spot to sit and eat, resting against a large wooden block or pillar that seems to separate the floor and roof of the level. While resting his back on it, Chardonnay hears muffled voices; not Hylin. Investigating, he discovers a colony of woodlice feeding on the rotting wood. Woodlice are gossips and information traders, so he quickly drags Marcus over to talk to them.

The woodlice — who speak in a chorus of repeating voices — are happy to trade information for information. Chardonnay boasts about how "The Great Champion Chardonnay" defeated the one-eyed rat. The woodlice eagerly measure him (so that they can describe him) and repeat the details. In return they tell him about the pack that one-eye had been thrown out of, the Eater Kit Pack, and it's Queen. The Pack is not far off to the left, on this level.

Marcus decides to try and trade for information about food. Merlot tries telling them about the usefulness of plague-masks, but woodlice don't have mouths to cover, and she forgets to arrange a trade beforehand. Marcus offers to trade the location of woodlouse food, for Hylin food. The woodlice agree, and he tells them that there are places in the Dripping Level where magic Eater liquids soak the wood. He says these liquids make Eaters strong, and will do the same to the woodlice. The Woodlice tell him that the Eater who lived above the Quiet Level has vanished, and suggest Stronger Eaters are Eating them!

Chardonnay suggests that they could just eat the woodlice, but Marcus gets them to give the information they wanted. The Woodlice say that there is a route past the rat pack that leads to a place on the very edge of the Empty where there is earth full of Hylin food, like worms, and roots. This is the opposite direction to Glenlivit's suggested plan, and there is some argument about which way to go. Merlot tries a vision to guide them, but the result is unclear. After a vote it is decided to devote a little time to looking for the mice Glenlivit mentioned — if they don't find them, they will turn around and follow the woodlouse route.

The mice prove surprisingly easy to find (Merlot makes an excellent roll, and spends one success to say that they find the mice quickly). They come across one mouse, scrabbling around in the ash. It is nervous till it sees Glenlivit, and then bounds up like an enormous (to a Hylin) puppy. The mice can't speak, and it takes a lot of work to get concepts across to them, but Merlot gets across the concept that they want to find more mice, and the mouse leads them to a family of four more mice, who have made a pile out of bits of broken plaster and are playing at balancing on top. More successes are spent to establish that the mice look well-fed and co-operative.

Merlot mimes being a hungry mouse-pup, so the mice decide to take her to their source of food. They lead the others to a place where the loose hair filling the level has been packed tight to make a big open space. In the middle is the monolith — a shiny black metal structure, 10 Hylin-lengths tall, and 25 long. When Glenlivit saw it last, it was safely inside the Between, but now the roof of the Between is missing! It looks like an Eater has taken a bite out of the Between! The mice run out happily and vanish round the back of the structure.

The open space is scary. No one wants to go out into it, but Marcus makes an inspirational speech and gets them to follow the mice. Round the other side of the metal thing they find the mice gathered around an odd long tube of brown paper, open at one end. Inside vague shapes are visible. No one knows what it is, but Atrox agrees to go inside. He finds a wall of something beige and knobbled, but when he nudges it with his nose it falls on him! He panics, runs around, the end of the paper tube gets crumpled, and he's trapped inside! Luckily Chardonnay manages to haul him out, but then has to sit on him when he whips out a dangerous chemical and tries to set the tube on fire in revenge!

Now Jinzu and Merlot decide to do their own investigation. There is a bit more confusion as they step on one another, but they realise that this is a giant packet full of food! It is filled with enormous beige rectangles, with round corners and white paste inside (Custard Creme biscuits) — 10 FS. Marcus suggests they need to get the mice away from here, so that Cold Stone can have all the food. Chardonnay suggests eating the mice; Glenlivit protests!

Marcus decides to eat some buscuit and then pretend to die, so that the mice get scared and run off. His acting only confuses the mice, but it convices Merlot, who starts squeaking that he's actually dead! Behold drags off the biscuit (to use as poison) and puts it on his snail, which has started to climb the monolith. He clings onto the snail and tells it to run (crawl), closing his eyes so he doesn't have to look at the Empty above. The snail obediently climbs the monolith, goes across it's top and then, finding a nice gap, goes inside, upside down! Behold opens his eyes to see that he's upside-down ... then the lid closes! He's trapped inside!

Meanwhile, the Hylin below are causing panic. Chardonnay and Atrox are fighting, then Chardonnay makes off to attack the mice, while Chardonnay pours out his pouches in the hope of tinkering something. Jinzu is running around in circles wailing about Marcus, who is still pretending to be dead, and Merlot is trying to get the mice to flee. As a result the mice actually do get scared, and start running off in every direction, because the food is now scary! Unfortunately for Merlot, the mice are convinced that she is a defenceless pup, so they grab her too, and run off with her into the Between!

At this point Chardonnay declares himself the victor, and jumps to the top of the monolith, in the hope that the Eater Beast will appear for him to fight. Instead he spots Behold's snail trail and realises he is trapped inside. He tries to open the entire monolith himself (by balancing on the hasp of the lock and mightliy pushing the top on) but instead gets himself trapped in the gap! He is crushed by the lid and, when he manages to wriggle free, falls to the ground. Chastened (and hurt) he crawls away and lets Atrox rig up something to open the lid.

Without Merlot, and out of time and energy, the party haul one of the biscuits back to the Nest. Between the biscuit packet, Behold's cache, and their individual stock of food, they manage to supply 17FS. Not enough to totally avert the famine, but certainly a partial success. Things would have been a lot worse without their efforts!

Five days later Merlot finally escapes the mouse nest and makes her own way home.

End of Year

Because this is the end of Winter we do ageing effects and Improvements. Chardonnay gets a new Legend "I bit off more than I could chew", and Marcus gets one for coming back from the dead ... again! Everyone gets a year older (and less lucky), and both Chardonnay and Marcus lose some Dice from age — only 1 Edge in Chardonnay's case, but three Stats in Marcus' (he is now 8 years old). No one dies from old age.

At the player's assistance we rolled a dice for each Black Dust Hylin, to see what happened when they took the Cold Stone test (drink a random liquid and see if you die), allowing players to spend Luck to turn a failure into a success. As a result nine out of ten Black Dust mice survived, including Kiri, Iro, and Parro.

Conclusions

  • Everything went very smoothly. As with the previous session the lack of remaining Rests created urgency.
  • The negotiation with the Woodlice was great fun. I did it only through RP (didn't force dice) but that was no problem. There were plenty of dice rolls in the session (many of which ended badly for the party as it happened).
  • I gave each player 1 Luck at the start of the session, because the adventure was 2 sessions long. This worked fine.
  • Players are still relying on me to suggest things to spend successes on, I need to encourage them to have their own ideas — possibly by shutting up and letting them choose!

February 27th

This was a short adventure, lasting one evening, to suit the time constraints of the 10-session block I have to work with. I decide to start with a vingette for each player. As it happens only a few players can make this session, so some vignettes go unused.

The adventure is called Figurines in Passing.

Merlot

Winter is shading into Rain (the first season of the new year), and Clorox — now Merlot's mentor — has fallen ill. He calls Merlot to him, and tells he he won't last long, and he wants her to have the source of his power, a fragment of a label taken from a sacred bottle (the rest was stolen from him by Glenlivet in her backstory). If she agrees she will become a seer proper, and a rival to Vimto. She tells him she is sure he will get better, but accepts the label anyway (it grants +1 Dice in Visions).

A week later Clorox is dead.

Marcus

Marcus is visited by Brasso, the former Champion. Though Brasso swore to serve Chardonnay, he feels that he has no real place in the Tribe now — Chardonnay doens't need him. He comes to Marcus to ask if he should leave the Tribe and become a Waykeeper.

Marcus doesn't want him to leave. He tells him that Brasso is brave, and the Tribe needs that bravery. If Chardonnay falls, Brasso will fight, no matter what it costs him. Brasso decides to remain after all.

Behold

Behold's daughter — who is also called Chardonnay — has been sharing a burrow with Jinzu's son Bailey. Now she has some newborn pups to show her Dad; they don't have names yet. While Behold gives the pups a groom, Chardonnay tells him that she and Bailey are worried that Absinthe's doom is getting closer, and that their children might be in danger. Since both Chardonnay and Bailey were born outside the nest (Behold and Jinzu were both Waykeepers) they are thinking of leaving to be Waykeepers themselves, because it might be safer.

Behold agrees! He shares his wisdom with his daughter.

Atrox

Atrox is approached by the Hunter Cinzano, who wants to hunt a centipede with the Netinator. He agrees and the two head off into the Dripping Level.

As a result of these scenes of bonding, the Tribe heals the 1 Exhausted it had from the arrival of the Black Dust Tribe last session.

After the vignettes are over, Merlot organises a funeral for Clorox in the Sacred Bottle Place, to which she insists that all the available mice she can find (Behold and Marcus) come. To her annoyance Vimto insists on coming, along with a contingent of her Cult of the Dead Eater followers, one of which is Iro, who has renamed himself Tabasco. Tabasco's membership of the cult upsets Merlot further, and she does her best to try and persuade him to leave.

Meanwhile Glenlivet, always the loner, is off by herself behind the skirting boards of the Sacred Bottle Place. She hears a noise, and sticks her nose through a gap to see the two Eater Kits, come down into the cellar. One — the larger — has something on his head, and cloth that covers the top of his legs, the other wears some sort of all-over cloth. The two sit on the floor and start to do something with what Glenlivet identifies as small effigies of Eaters (the two children are playing with makeshift dolls made from clothespegs).

Immediately she wants one! And she pushes herself through the gap to go after them!

At around this point the funeral procession (which is behind the bottles on the shelf) becomes aware of the Eaters. The cultists and Vimto take this as a religious message, and some of the cultists start to gather at the edge of the shelf, ready to run to the Eaters. Merlot takes exception! Vimto and she have a 'vision off' to try and control the situation, but it goes badly for Merlot. Only Tobasco seems to be listening. He is still carrying his Eater mask, but he's taken it off.

Behold decides that reinforcements are needed, and he runs off back to the nest, finding Bailey, Jinzu, Brasso and Chardonnay (the PC) willing to come with him.

Before the situtation can be resolved the big Eater appears, and calls two the other two, who abbandon their play and run from the cellar — but not before leaving one of their idols behind! Naturally everyone decides they must have it! Vimto wants to worship it, Merlot wants to keep it from Vimto, and Behold just wants to remove it. Of course Glenlivet, who somehow avoided the Eater's giant feet, is there first, and sets about trying to steal it. The only problem is that it is about four times her size!

While Merlot tries to block the cultists, and Behold leads his posse off behind the skirting, Marcus jumps down and runs to the idol. Here he scraps with Glenlivet, browbeating her into giving up the idol to him. However, no sooner has he done so, than the cultist mob turns up and tramples him, taking it for themselves. Moments later Behold also arrives!

At this point Chardonnay's player arrives.

Chardonnay, seeing violent Hylin attacking each other, rushes in to try and stop them, pushing some back, but getting bitten and scratched in the process. In the confusion Marcus blames Chardonnay for the violence, and the two face off in some unexpected PVP. While Behold succeeds in getting the idol, Marcus and Chardonnay beat each other up, before Marcus steals Chardonnay's Champion badge — calling him unfit — and storms off. A rift has appeared in the Tribe and it might be fatal!

The session ends on this uneasy note, and the Tribe takes 1 Hurt from the PvP.

Coda

Out in the Between on his own, Cinzano is packing centipede bits, when he feels a giant hand settle on his neck. "You Cold Stone?" says the rat? In response to his terrified nodding the rat says: "Champion Whiteclaw heard about your mouse who beat a rat, and he wants a go. Tell this Chardonnay to come and face him, or else!"

Conclusions

  • Everything went very smoothly up to the PvP, which I was not prepared for. It was late, players were tired, and passions got raised, and I could have handled it better.
  • The game is not set up for PvP. There were immediate questions about who (if anyone) got to spend Tribe Dice. Afterwards I add some PvP rules, which sum up to:
    • Don't
    • If you must, neither side can use Tribe Dice
    • If one player Takes Out another, the Tribe takes 1 Hurt damage
  • I really like the vignettes as a change of pace from the adventures so far.

March 6th

The previous session ended on high drama: Marcus beat Chardonnay in a fight and took his Champion's badge, and an ominous incident with a rat scared Cinzano.

A couple of weeks have passed since the funeral, and Rain has bled over into Spring. The Tribe has 1 Afraid (from Absinthe's prophecy) and 1 Hurt (from the fight between Chardonnay and Marcus). The Eater idol, in all its glory, sits outside Behold's burrow, quieter now that his daughter has headed out into the Between.It is time for an adventure called Queen of all she surveys.

Back in the nest the debate about the Champion still rages. Marcus is trying to argue that the Champion isn't needed — there should be a chief warrior, but someone more level headed should be in charge. Tonic, ever the traditionalist, says that chief warrior is the same thing as Champion! We start the session playing this argument out in character, with the other characters siding with Tonic. Eventually Tonic agrees that perhaps a negotiator of some sort is needed — everyone has heard about the rat's message — but that doesn't mean they shouldn't have a Champion, they just need someone else as well, a mastermind, a leader. Tonic remembers a picture she saw on a bottle once of an Eater who seems to fit the part, and proposes that the new role be called The Napoleon. Marcus has no choice but to agree.

The players quickly decide that an election is the right way to choose a Napoleon. Marcus demurs, so Junizu puts herself forward. So does Vimto. As soon as Vimto does, Merlot does, and Behold decides to throw his paw in the ring as well. The election is fought dirtily, but in the end Jinzu wins. We come up with a new power for the Napoleon title — once per adventure, she can remove a point of Hurt from the Tribe, and she quickly heals the 1 Damage from last session.

Apparently just in time. No sooner has Jinzu accept the offer than Bailey arrives at the nest with an urgent message. Three strange Hylin are approaching, and they smell of rat!

A Delegation

Soon the strange Hylin arrive. They are dark grey, but on each one's back a rat's paw-print in white can be seen. The scouts think there may be rats close by, but they appear to be trying not to show themselves. The strangers introduce themselves as Kree, Killi, and Kora — Bondmice of the Queen of the Eater Kit Pack, also called "Queen of the Upper Places", leader of the rat pack. The Bondmice are a Hylin tribe that have sworn some sort of allegiance to the rats. Kree calls it "a partnership" but the Cold Stone mice aren't sure.

The new Napoleon Jinzu, and the Champion Chardonnay, greet the strangers constantly. They ask for shelter, they've been in the Between for days, and Merlot cunningly presses the former quarantine camp of the Black Dust Tribe into use. Kora hangs a banner on the front.

The next day the Bondmice present an offer from the Queen. She invites the Cold Stone Tribe to send representatives up to her nest, with a view to joining her alliance. Kree, earnest, assures the players that they must do so, they have no choice. A terrible doom is coming, and the rats are the only hope they have for survival! Killi seems less fervent, but doesn't speak up, and no one gets the chance to speak to him alone. When they don't believe him he tells them that there is absolute proof at the rat's nest. If they come, he can show them. Reluctantly the Cold Stone Tribe agrees to send a delegation.

Meanwhile Jinzu and Behold try to work out who these Bondmice are. Not Cold Stone, not Black Dust. The only other Tribe they have ever heard of was called "High Wood" but they know nothing about them.

The delegation sets out a few days later. It consists of Merlot, Marcus, Jinzu, Chardonnay (still due to have a duel with the Queen's champion), Atrox (who prepares by making poison with Chardonnay), and Glenlivet. Behold does not wish to go, so his player quickly generates a character sheet for Tabasco, who goes as a proxy for Vimto.

On the road

It is a two day trip up through the verticals and levels to the rat's nest. The party sees no rats, but is sure they are close by. On the way Marcus tries his best to befriend Killi, but the youngster is nervous, and reticent. Even with the other distracting Kora and Kree he won't open up entirely, but promises to show Marcus something when they get to the nest.

The Rat's Nest

The rat's nest is a huge heap of torn cloth and stolen clothing pressed up against a vertical high up in the Between. One of the Eater Kits' idols, its head chewed off, stands at an angle at the front. Bondmice scurry about, while huge rats swagger. It is terrifying, but Chardonnay uses the Champion's ability to make everyone avoid the Afraid Damage. No sooner have the party arrived than a massive rat with one white paw appears — Whiteclaw. Whiteclaw would happily fight Chardonnay on the spot, but the Queen wants to see them.

The visitors are led to the Queen's chamber, a big open space with a lead river running along the back, and many rat hangers on, heaped up in a pile with the Queen on top. Kree seems to be a favoured councillor.

The Queen offers much the same as Kree has outlined. An alliance, although one where the rats are clearly on top. She presents it as both the sensible option, and an inevitable one. She doesn't go as far as actually threatening them, but close to it. (Some players are of the opinion that this sweet approach is Kree's plan, rather than the Queen's.) The characters try arguing, but without conviction, and she cuts them short by ordering Kree to give them a tour of the nest, so that they can see how nice it is, and then be given a chance to rests and discuss. It's clear they won't be allowed to leave.

Kree takes the characters on a guided tour, where they see happy and well-fed Bondmice working with the rats and living in spacious burrows. He makes it sound like a rat-led utopia. Marcus, meanwhile, is desperately looking for an opportunity to slip away with Killi and find what he wanted to show them. Tabasco enters a trance state where he sees the patterns and movements of the rats, picking out the perfect moment where Marcus can slip away.

Killi takes Marcus into a side-passage and explains that the mice they have just seen are "trusties" working with the Queen. Most of the Bondmice are ill-fed and ill-treated, kept trapped in their own warren. He tells Marcus that they used to be the High Wood Tribe once, but the rats conquered them. Their own Champion fought a rat and almost won, but the rats killed him anyway and seized the tribe. Now they are prisoners. Marcus tries to persuade Killi to rebel, but the youngster is too afraid; Marcus will need to talk to the other mice directly.

Killi tries to take Marcus to the Bondmouse warren, but they find the way guarded by two rats. Marcus tries to bribe them with food, but they take the food and smack him, and he has to run away. Killi tells him that the only other way into the warren is a back tunnel full of spiders, but Marcus doesn't fancy that alone.

Meanwhile, back in the main nest, Jinzu and Merlot ask Kree to show them the 'evidence' he mentioned back at Cold Stone. He agrees, and leads Jinzu, Merlot, and Atrox to the lead river. A hole has been gnawed in the side, and they see that it is hollow. Following it for some way they find themselves looking out over the Great Empty! It is full of fire! Pillars of light cross the open space; things burn and collapse; huge roars shake the night! The sight inflicts 1 Afraid on each of them. Kree tells them that the Eaters have turned on them, they are destroying the Between, and it is growing worse, day by day. Soon their part of the Between will be destroyed too, and only the rats can save them.

The chastened and afraid Hylins accept the offer of a place to rest and eat, and meet up with Marcus. Fearing that they might be overheard through the thin walls, they scribble notes on scraps of cloth and then eat them. They need a plan, but they haven't got one, other than a fight to the death with Whiteclaw. "If I win, they might let us go, or respect us," says Chardonnay, then Marcus tells him about the fate of High Wood's champion. Atrox considers poisoning the whole nest, but he doesn't have enough poison, but maybe he can make whiteclaw sick? Marcus wants a rebellion, but is no closer to having it.

The session ends with no plan yet winning, but this adventure will be three sessions long, so they have time.

Conclusions

  • There was a lot of RP this week, which is no bad thing, although it doesn't test a lot of mechanics.
  • Marcus failed a roll for the first time! Rats are more serious Trouble than mice or woodlice!
March 13th

The party wakes in their "guest-quarters" after an uneasy night's rest. Atrox decides that he'd like to see what sort of tinkering the Bondmice do for the rats (and get his paws on a workshop). Finding that Kora is already standing by he asks to see the workshop, and she takes him there. He finds two Bondmice working on some sort of cutting tool, made with Hylin teeth ("where do you get the teeth from?" he asks — "You know, the bodies ...") and a burly looking Hylin called Krotek supervising.

Quickly working out that Krotek is no tinkerer he sends Kora back to get Chardonnay, who distracts Krotek with conversation about fighting. Kora, realising that no one us supervising the guests, rushes off, but not before Glenlivet sneaks away to look around the rat nest. She sees a lot of fat rats, some skinny Hylin, and entrances to the Empty. Eventually she finds a place where they have been nibbling something white and powdery off the wall — the source of the white marks on the Bondmice! She tries to eat a mouthful, but it gets all sticky. Before she can steal more, a rat turns up (the rat was a GM success from a failed scrounging test).

Glenlivet tries to fast talk the rat into thinking that she belongs there. Instead she convinces it that she is a Bondmouse out without its mark! The rat is not happy! It demands to know who her supervisor is, and she quickly claims that it is the workshop (where she knows Atrox and Chardonnay are). Grabbing her ungently in its jaws the rat drags her there!

Meanwhile, Marcus and Tabasco ask to be shown the view from the lead river again. Kora agrees, seeing it as another chance to persuade them to join the "alliance". It is day now, so the view is different, less fire, more smoke, but it is abundantly clear that nearby bits of the between have been demolished outright. Marcus tries to peer over the edge to get an idea of the lay of the land, but the sight is too terrifying for him

Meanwhile, in the workshop, Atrox manages to talk to one of the tinkerers, Kindling. Kindling reveals they are making a thing to cut up fungus — there is a huge mass of red-brown fungus nearby, Kindling's fur is stained with the dust from it. Atrox talks up the bounties of Cold Stone compared to the poor facilities in Eater-Kit, and Kindling — apparently a kindred spirit — says Atrox needs to go and speak to Kameoleopardus, in the Bondmice warren. Before he can say more, the rat arrives with the injured Glenlivet, and demands an explanation!

Krotek, his nose already put out of joint by Chardonnay, denies all knowledge of Glenlivet. The rat is about to punish her further, but Atrox and Chardonnay convince it that the Queen would be angry, and it eventually leaves — though not before scaring Glenlivet half to death!

Later ...

Everyone reconvenes, and goes for a walk, eventually managing to find a place where they think they can talk without being overheard. They agree that they don't want to end up like the Bondmice! They take a vote on what to do. Tabasco wants to flee, Glenlivet wants to rob the rats and then flee, Atrox wants to follow Kindling's advice. Both Marcus and Chardonnay agree that don't want to leave the Bondmice behind. If they can persuade them to rebel, maybe they can also persuade them to run away, although that may well mean abandoning Cold Stone. It's a sobering thought, but they all agree that disaster is coming anyway, and they can't leave the Bondmice behind. Chardonnay offers to challenge Whiteclaw to a duel, so that the rest can use the distraction to get away. It's almost certainly a suicide mission, but he is willing to try.

They still have to work out how to get to the warrens and persuade the Hylins, however.

Tabasco takes the holy liquid and has a vision. He realises that the rats generally sleep during the day. If they wait till noon, maybe they can get inside. Chardonnay suggests that he goes and distracts Whiteclaw, while Marcus decides to steal more white stuff. The rest wait, and then try to sneak into the warrens.

Divide and Conquer

Marcus' expedition goes moderately well. He finds the white-stuff without incident, and sets about chewing off a pouch-full. Sadly the work is too exhausting for him, and he has to take a nap, which makes him sit out the next scene. Chardonnay, meanwhile, encounters Whiteclaw, and forms the opinion that he is honourable — for a rat. As long as Chardonnay doesn't cheat, Whiteclaw would probably accept his surrender.

The others try the tunnel to the warrens. As the vision suggested, the two rat guards are asleep, and they manage to sneak past them. They find themselves in the warrens, which are close, mildew covered, and boiling with tension. Nervous Bondmice — obviously in far worse condition than the few show-slaves they have been shown — watch the strangers fearfully. The whole place feels like a powder-keg.

They try asking for directions to find Kameoleopardus, instead they end up being confronted by Krozier, a one-eyed Hylin who tells them they cannot fight their doom! Rot will claim them all! Krozier seems demented, but attracts an audience, so Tobasco tries facing up to him. Their duel of words quickly turns nasty, it might boil over into violence at any moment. Tobasco does learn that it was Kora who took Krozier's eye, and his powers as a seer.

Glenlivet spots one mouse sneaking for the exit, no doubt going to warn the rats, and gives chase! Atrox decides he needs to find Kameoleopardus instead, and goes looking for him. Luckily the old Hylin — the last surviving who remembers freedom — is easy to find, and when Atrox introduces himself as Katrox, the elder is convinced that there is a lost colony of High Wood out there, one still following the old ways (i.e. names starting with a K). Kameoleopardus is instantly sympathetic to Katrox's plea to rebel (Atrox's player won the roll with a handy 5 successes!) and they hurry to try and save Tabasco before chaos breaks out!

Conclusions

  • Before the session Marcus' player raised the concern that the mechanics were not deadly enough, leading to players not feeling challenged. We discussed a number of rules tweaks that might resolve this. We didn't use any of them this session. Despite this Glenlivet was nearly taken out, Marcus was taken out, and Tabasco was reduced to 1 Life with all his Luck spent! Rolls failed all over the place, and Trouble nearly got out of hand. Conclusion: watch the danger issue, but don't change anything yet.
  • Rendering Marcus unconscious from mining was a bad call. I did 2 Exhausted Damage, not realising how close to zero he was. Mostly it was to avoid a repeat of the "rat turns up and is angry" scene, but I should have thought of something more dramatic to do with my successes.
  • The new social defensive edge (Cringing) was used for the first time. The 1 Armour it provides Kept Tabasco in the fight, but he needs rescuing!
  • Again, this session showed the weaknesses of the hyper-specialised characters when they tried to do things other than their area of expertise. That's probably a good thing.
  • I gave each Bondmouse a personality trait that would give the players a bonus dice if they worked it out. e.g. Kameoleopardus gave a bonus dice if his nostalgia was appealed too, while Krozier wants revenge.
  • I represented the "Bondmices' Fear" as an Obstacle that needs damage to overcome. Each Bondmouse persaded to the cause does one Damage, as do other relevant actions. So far Atrox has inflicted 2 Damage on it — one for his workshop propaganda, one for persuading Kameoleopardus.

March 20th

This session Yael returned, so we had her help in the social scene with Krozier.

We return to the fight in the middle of the Bondmouse nest. Krozier leads the resistance against the talk of freedom. Meanwhile a sympathiser named Ketchup slips away to try and warn the rats, but Glenlivet spots him and gives chase. They dodge back and forth through the warren, and Ketchup nearly gives her the slip, but she catches him just in time and drags him back.

Meanwhile Behold and Merlot team up to argue with Krozier. They tell the Bondmice that if they don't seize this chance of freedom they may never get another. There is a doom coming, and the rats won't save them from it. Their argument is helped when Atrox arrives with Kameoleopardus, and Glenlivit drags Ketchup back. Krozier backs down and a wave of enthusiasm sweeps the slave Hylin — they might actually be able to escape!

Some of the other Bondmice still need persuading. Kindly, a wounded Fungus farmer, wants to help but isn't fit, and Kin, a young mother, had her pup stolen by Kree's mate. While Merlot tries to treat Kindly's injuries, Glenlivit swears she will get the pups back — and proves to be perfectly capable of doing so!

The party try to hatch a plan. They know that they need to spirit the Bondmice away while the rats are distracted; there is one obvious opportunity, Chardonnay will give Whiteclaw his fight. While the rats gather to watch, the others will escape through the spider tunnels, and then head for the vertical that leads to Black Dust. The others tell him that his plan is suicide, but he is adamant, and leaves to speak to Whiteclaw in front of the nest. He comes to the conclusion that Whiteclaw might let him live he he seems to be an honourable fighter.

Atrox proposes making a fake rat out of wood, fur, and rat scent, so that any sentry thinks that they are a work party. Marcus (recovered from his faint) paints Bond-marks on the players. Meanwhile the Bondmice prepare to move.

The fight and the flight are played simultaneously

The flight

The escaping hylins face a series of obstacles: tunnels full of spiders, guard rats, and then the long level until the safety of the vertical — they make all three look easy!

With the help of the Bondmice, and their own advance planning, they easily navigate the spider tunnels, then assemble their fake rat. It proves to be a good plan, since there a still a few sentries not at the fight. They see a number of marked hylins accompanied by what smells and looks like a rat (a rat stuffed with refugee hylins!) and let them pass. Then all that remains is a long dash through the level, coping with exhaustion, until they reach the vertical.

It would be the perfect escape — if only Chardonnay were with them — or so they think. They have just reached the top of the vertical when everything begins to shake ....

The fight

In front of the rat nest, battle is joined between rat and hylin — not an aged one like One-eye, but a rat Champion in his prime. It should be epic, a tale for the ages, but in truth Chardonnay is outmatched from the beginning. He manages to scratch Whiteclaw with Gilette, but the rat overbears him, clawing him badly and nearly ripping his throat out! Chardonnay dodges, trying to get behind the champion, but Whiteclaw is too quick! He bites Chardonnay again, putting him on the edge of death!

Chardonnay knows the fight is lost, but he refuses to go down easy! He rallies everything into one last attack (using the Determination rules) and slices Whiteclaw's ear from his head! Enraged, the rat raises his claws as Chardonnay collapses from the effort ....

At this point Chardonnay dies, having been reduced to 1 Life, he then takes 1 damage from the Determination. Since there is no one there to save him he's gone ... unless the other players agree to pay 3 Luck to save him. There are exactly 3 luck left in the game at this point, and the others agree, they will save Chardonnay! He still dies (as far as they know) but will somehow prove to be alive at a later date.

Whiteclaw rears for his attack ... and everything explodes! An incendiary bomb hits the house full on, and the Between collapses with a roar of dust and ash!

Will anyone survive?

Conclusions

  • Overall the session flowed very well. We tried new rules for spending Luck on facts, and for Determination (which allows you to ignore all wound penalties for an action, and then take 1 Exhausted) and both work well.
  • The fight with Chardonnay and Whiteclaw was tense, brutal, and totally fatal for the hylin. After weeks of discussion about whether any enemy could be hard enough for a specialised combat character, we saw that they most certainly could!
  • Using the 3 Luck to save Chardonnay was perfect! (That's a rule I took from my own game Sun Keld and it was a great idea)

March 27th - Endgame

It is the Blitz, 1939. All across London, ancient houses are blown to pieces. Fire rages, the night is full of flames and the beams of searchlights. One accidental target is a Victorian gatehouse, standing at the end of what was once the drive of a private house. Long since converted into three small flats, the building still houses what was once the butler's cellar.

Most of the house's inhabitants have already left. Mr Connor was drafted earlier in the war, his children — and even his cat — evacuated over the winter, while his upstairs neighbour, a lone man of German descent, emptied his hidden strongbox of cash and fled the onset of war. Only poor Mrs Connor falls victim to the bomb that hits the house .... Mrs Connor, and two desperate tribes of Hylins and Rats ...

In the walls

The bomb causes instant and widespread damage. The roof above the Connor children's room collapses, taking down the next door chimney, which crashes through the upper floor, bursting water pipes as it goes. The incendiary itself hits the lower floor, starting a rapid blaze that consumes the basement first, then spreads upwards. Meanwhile the wall that runs opposite the chimney (and separates the wine cellar from the coal cellar) half-collapses ...

Deep within the wall, the Cold Stone tribe and their Bondmice allies are trapped by the falling wall. When the dust clears and the roar of the collapse fades, they find themselves separated and scattered, squeezed into the tiny spaces between the bricks. Most of them can't even see another Hylin, or — if they can — only one or two. Everyone takes 1 Afraid.

Slowly the survivors set about trying to find each other. Luckily some of the Bondmice are skilled diggers (Chardonnay's player took on Kindling, and Jinzu's player, who turned up unexpectedly, also takes on a Bondmouse), and they slowly manage to dig through enough rubble to get some of the groups together, although there is a constant danger of further collapse. In one incident Merlot is hit by a falling lump of brick, and her walking stick is broken (which upsets the player more than her death might have done!); in another a further collapse separates two groups who had just managed to get back together.

It takes a long time for the Hylin to gather, but eventually the survivors resume their journey back down the wall, counting their casualties and injuries.

Before they reach the bottom, however, the Seers — Merlot and the more distant Behold (back at the nest) as well as everyone else touched by the Green Fairy — find themselves dragged into an apocalyptic vision! Not their vision, but Absinthe's. The old seer speaks to them from out of the flames, the nest is burning, and the Ladder of Heaven as well! He tells them that his vision has finally come true. This is the time of the fire, the flood, the end of the Tribe! But there is time for one last vision. Behold sees his family safely on Jinzu's ship, Jinzu sees them meeting up, while Merlot sees the survivors (or some survivors at least) reaching the Empty, where an Eater Beast swoops from the sky, but then turns away.).

Shaken by the vision, the seers hurry everyone in the direction of Cold Stone, only to meet their nest-mates fleeing the other way, pursued by a fire!

The Fire

Flames swirl through the Between, consuming everything they touch. There is no fighting them, it is all the Hylin can do to retreat before them. There are a limited number of rounds to escape the fire before the Tribe takes Damage — everything here is on a countdown, each danger they face might damage the tribe, if it takes too much damage they don't escape. Alternatively, if they can brave all the Trouble with Life still left in the Tribe, they will make it to the Empty.

The Fire attacks like a Monster, targeting individuals (it is also large, and overwhelming, forcing them to use defensive edges), but the players succeed in getting most of the hangers on out of range. There are a few chancy moments, but for the most part they escape without casualties, but everyone is now Exhausted. They stumble on, heading through a part of the Between that they have never visited before, till they reach a sheltered place where the fire hasn't yet reached and decide that they dare a Rest.

Even as they collapse gratefully into the corners, dust trickles from above, and smoke begins to drift by, they don't have long.

Conclusions

  • Representing the fire as a Monster had mixed results. The new formulation of Overwhelming worked very well, but having the fire attack an individual on its turn, and then having them all roll against it on their turn, didn't make so much sense. I'm considering a new "Disaster" action, where it gets to roll against a fixed number of dice (number of players? 4? number of players capped at 5?) and then spend successes against everyone.
  • The group vision went very well.