< back to art homepage : About the mural : details
Anubis (and Wepwawep) Mural
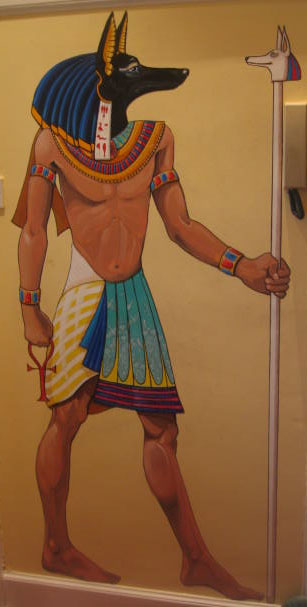
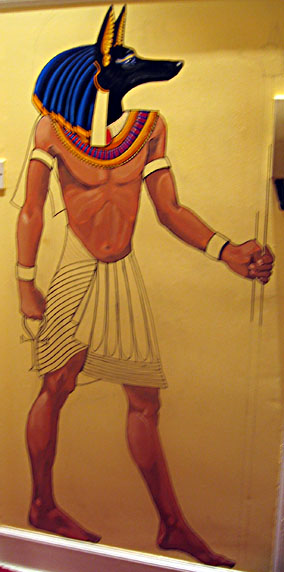
This page is all about the Anubis mural which sits on the wall of my house in Edinburgh, and the process of drawing and painting it. You can see the finished mural on the right (as well as on my wall). Anubis is around 5 foot 6 inches tall, and has a whole wall to himself.
This mural had its beginnings in a hasty wall drawing that I did in a rented flat many years ago. That original Anubis was a present to my wife (who is Anubis mad), and we loved it dearly, even though it was out of proportion and was never taken beyond an initial sketch. When we left that flat behind the Anubis mural was the one thing we were sad to leave behind, and we swore that one day we would re-create it.
Our next flat, however, was not one where we could draw on the walls, and even when we got our own house there was nowhere suitable. At last, however, in 2007 we had the old textured wallpaper on our hallway wall replaced with smooth lining paper and the stage was set for this mural to begin.
The rest of this page shows a number of stages in the creation of this mural, from the initial drawing through to its final state.
Click on the preview images next to each step to see larger versions (these will open in a new window).
All about the drawing
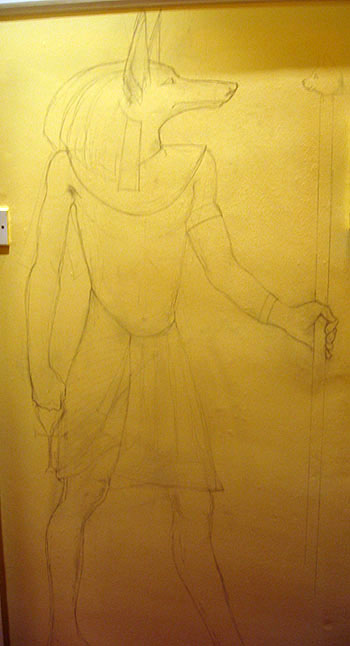
1. Initial Drawing
The first step was an initial drawing done in pencil. For this stage I had the invaluable help of my Dad, who is a much better figure artist than me. We began by studying illustrations of Anubis, including my own previous wall drawing. From these we created a couple of small sketches on paper until we were happy with the shape, then we moved to drawing this out on the wall. The hardest stage by far was the left hand, which we redrew more than once before we got the final version.
After the pencil stage was completed the lines were drawn in using a large size permenant marker pen.
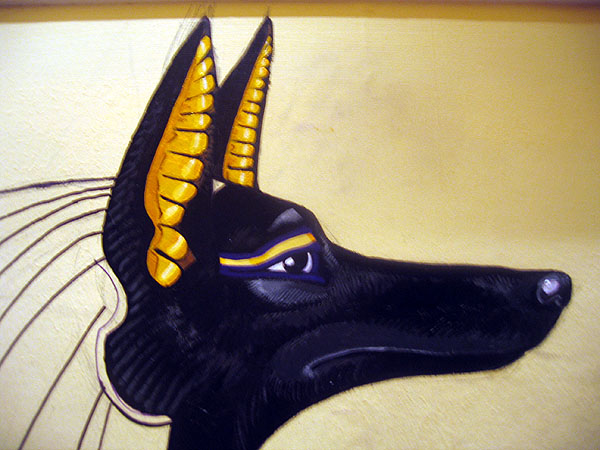
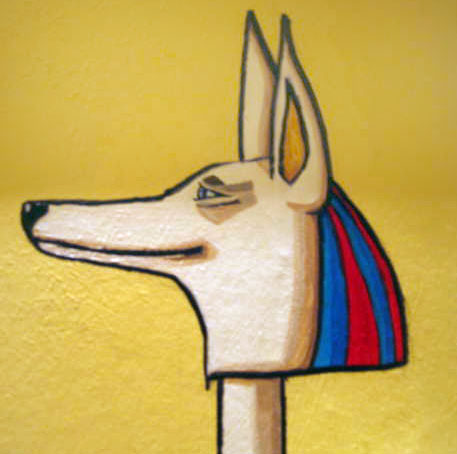
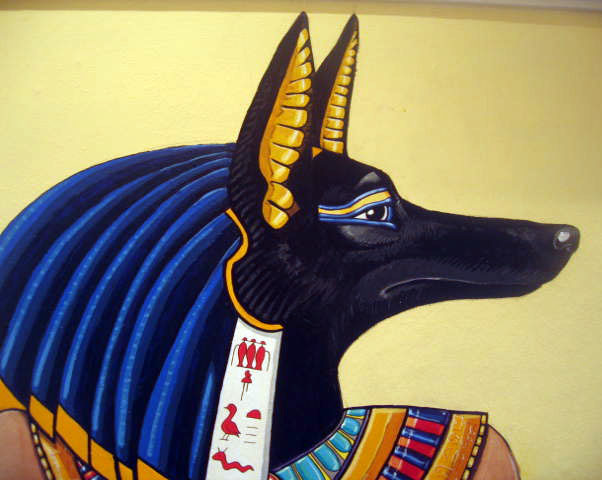
2. The Face
The most important part of any painting must always be the face, so that is where I started. The face was painted in black, highlighted in grey with a fine brush (00, 000 and in a few places 0000) as well as a fine permenant ink marker.
I made the descision to paint Anubis with his ears facing forward, even though many illustrations show him with ears that face backwards, I feel that this way really brings his face far more to life.
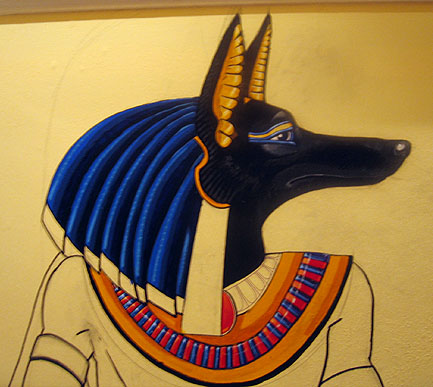
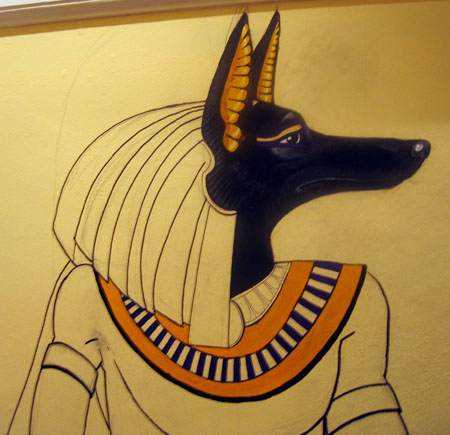
3. Around the head
Once the face had been painted I began to block in the areas around the face, such as the torc around his neck, the headdress and so forth. These areas were painted in with blocks of pure colour, after which I went back and added more detail, such as the colour and highlights in the hair, the illustration around the eye, and the gemstones on the torc.
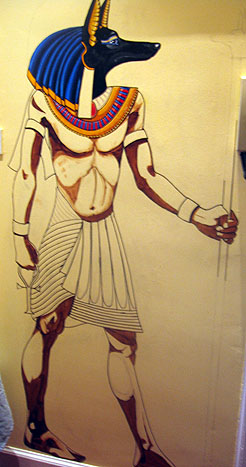
4. Underpainting the Body
Working on the head took me around 3 days (not all day, but a good few hours per day). Once this was finally done I was ready to move on to the body. After trying out skin tones on the sketches I'd made in step one I moved on to painting shadows on the body in burnt umber. These shadows were done thickly with a broad flat 3 and 1/4 inch brush, and then allowed to dry for a full day to make sure that they were totally fixed before I moved on with the body. Needless to say I was itching to do more the whole time!
5. The Body
Once the shadows were dry I painted over them with a semi-transparent skin tone mixed from white, bright yellow, and ochre with a little bit of red added. This shadows showed through this in varying degrees, as did the yellow colour of the wall beneath. Once this was dry I overpainted the skin with lighter strokes (using more white) as well as working back into some of the shadow areas in more detail.
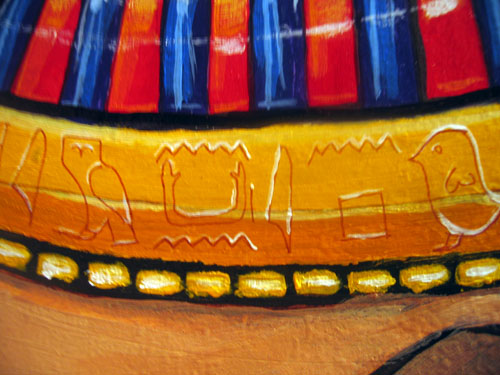
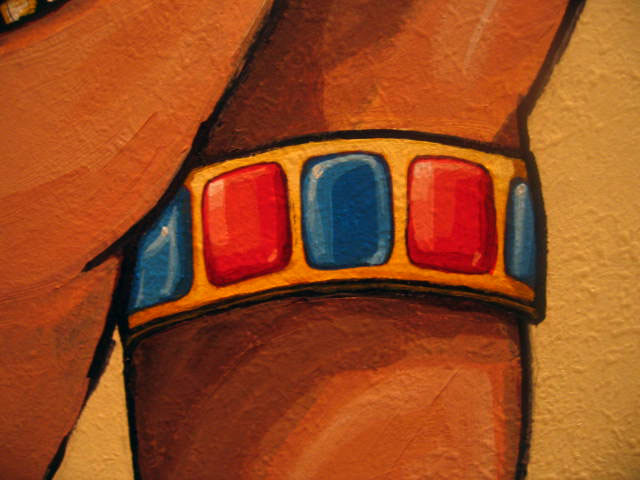
6. Back to the Torc
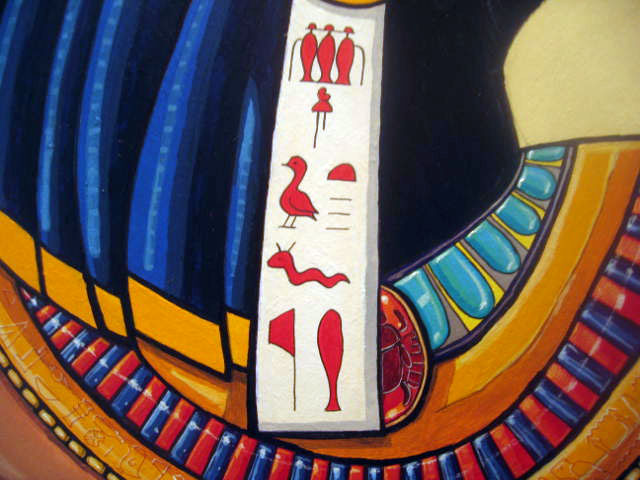
With the body done I returned to detail painting, starting with the gems, panels, and writing on the Torc. Around the lower band I wrote the following, adapted from the standard offering formula.
htp-di-nsw wsir nb abdju, nb djedu, di.f prt-hrw t hnkt hrt nbt nft wabt n ka n inpw imw-wt tpy dj.f
An offering that the King Gives, to Osiris, Lord of Djedu, Lord of Abydos, so that he may give a voice offering of bread and beer and oxen and fowl and alabaster and everything good and pure on which a god lives, for the soul of Anubis, in the place of mummification, upon his mountain
The illustration here shows a detail of this inscription. After this I moved on to the rings on the arms, which were painted with red and blue gemstones like the torc.
7. Wepwawep's Staff
Anubis traditionally holds a staff with a jackel head. In this mural I made this a representation of Wepwawep, the Opener of the Ways, a traditional adjunct of Anubis. Victoria painted the head of Wepwawep, while I painted the staff and some of the minor details on the head. The red and blue in Wepwawep's headdress were deliberatly chosen to be brighter than the ones in Abubis', and these colours were re-used in the kilt area of Anubis for continuity.
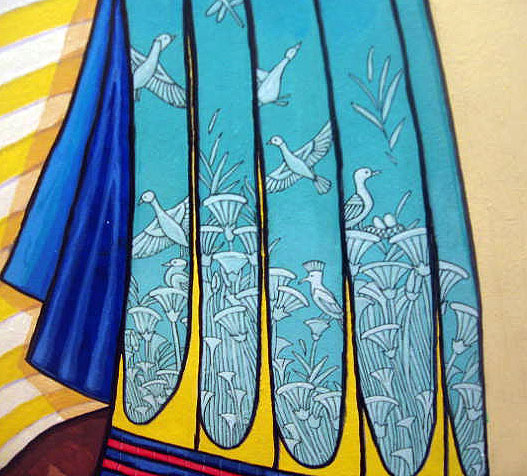
8. The Kilt (view of Amaneti)
The final major area to be painted was the kilt. This is split into three sections, a small white area, a larger white and yellow area (on the left) and a very illustrated section on the right, as well as a few bits of hanging cloth in between which echo the colours of the rest of the painting. The white and yellow area gave me a lot of problems, since I realised that I needed to paint out the heavy black lines that I had drawn in, but had to use coat after coat of paint to achieve it.
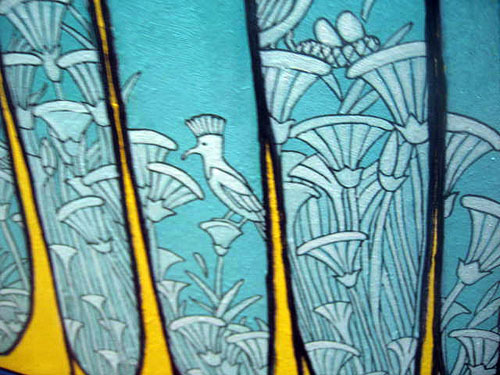
Once the other areas were done I worked on the detailed drawings on the right. Each panel shows a view of Amaneti, the blessed afterworld, filled with papyrus stems and birds. The left panel shows three ducks, the second from the left a dragonfly, the third two ducks and a hoopoe, and the fourth a bird sitting by its nest. These drawings of reeds and animals are typical of many egyptian hunting scenes.
Each one of these panels took around a day to do. The lines were first drawn with a 0.5mm graphic pen and then painted in with a 000 precision brush. Finally they were highlighted in white using the same brush.
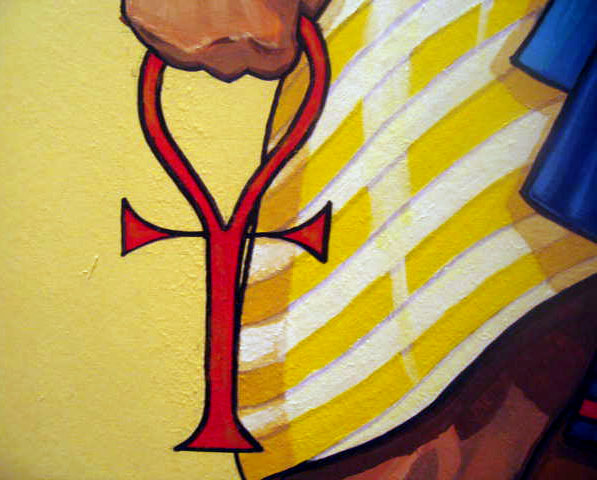
The Ankh was done as part of the kilt area. It is simply painted in red (a nod to Set), and then drybrushed with gold paint.
9. Back to the head
Finally I moved back to the head for the last areas of detail, the intaglio of Kepheri on the gem at the neck, and the dedication on the tag at the head. The intaglio shows Kepheri the scarab god who pushes the sun across the sky. My intention was to make it seem as if the scarab has been carved into the ruby of the gemstone. I also painted the band adjacent to the gemstone in the same colours as the kilt, with the addition of silver sections and highlights. For this I used a citadel chainmail paint and 0000 brush.
When the gemstone was finished only one area remained, the tag at the head, which had remained blank (and undefined) for the whole time so far. In this area I painted a dedication to my wife Victoria using her Khemetic name, Khentysatuef, which translates as "Foremost of his daughters". The full inscription is as follows
khnty satw.f hm ntjr
foremost of his daughters, servant of the god
And finally .... done!